What is a Binance wallet?
Trading crypto in the Binance network has never been so easy with the advent of the Binance wallet. To trade coins from other networks, a pipeline should be established through your wallet.
You can do the other things through this wallet: converting BNB to other coins, producing non-fungible tokens, and coin staking. You can do all this and more right in your browser extension.
How does the Binance wallet work?
It is a browser plugin for Brave, Microsoft Firefox, and Google Chrome. Through this wallet, you can transfer coins within the Binance network. You also have the option to tap into other blockchains to access a wide array of coins.
Among the blockchain networks to which you can link your Binance wallet are as follows:
- 1Inch
- Metamask
- Uniswap
- PancakeSwap
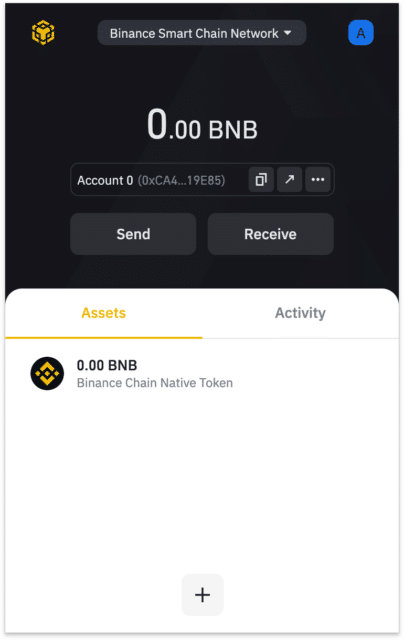
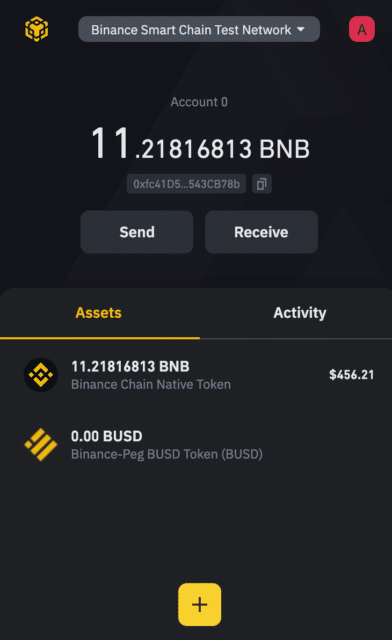
To make use of this wallet, you must install the plugin in your browser of choice. Once the setup process is complete, your wallet should look like the image below.
How to use the Binance wallet?
This wallet is created for crypto users in the Binance network. If you have no account yet in Binance, register an account first and then install the wallet. After this, establishing a connection between your wallet and Binance is a cinch using Wallet Direct.
One purpose of putting up this wallet is to simplify and expedite the process of transferring crypto within the Binance network. There is no need to waste time copying, pasting, and verifying crypto addresses through this wallet. Not only will this accelerate the process, but it will prevent potential errors.
Binance pros
- The wallet supports thousands of digital currencies.
- Setup is easy for existing Binance users.
- The wallet supports both SegWit and Bech32 protocols.
Binance cons
- It provides mediocre customer support for the wallet.
- The look and feel of the user interface are not so great.
- Less technical users might have a hard time learning how to use the wallet.
Binance wallet fees
Wallet fees are shared among validators processing transactions. These network fees are applied as a means of preventing network abuse. All transactions besides new orders incur fees. New orders do not involve fees to stimulate network use.
Be aware that the network fee corresponds to the transaction amount. The greater the transaction value, the higher the cost is applied. The higher the transaction fee, the faster it takes to complete the transaction. The opposite is true for lower transaction amounts. In contrast, the turnaround time of transaction processing is an inverse function of the transaction fee.
Binance wallet functions
It performs several functions, such as receiving, sending, adding, and staking coins. You will learn how to perform these transactions in this section.
Receiving coins
You can get your crypto address by selecting the Receive option on the interface. When you do this, you will see a QR code or a wallet address. You can either scan the QR code or send the address to your crypto sender.
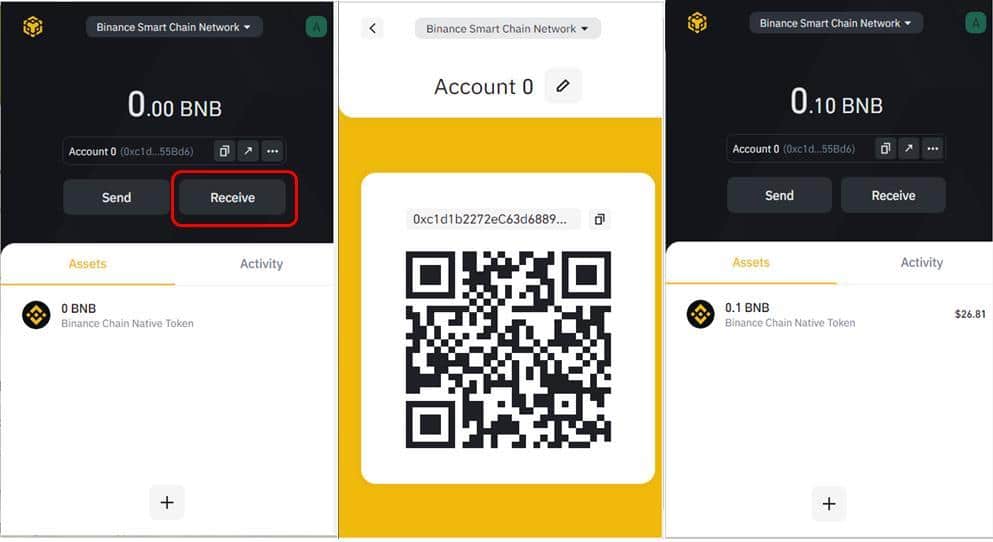
Exercise due care when receiving crypto. Because the wallet provides support to various blockchain networks, there is a possibility that the sending transaction fails. To avoid this, make sure that the network of the sending party or account is the same as your network.
Sending coins
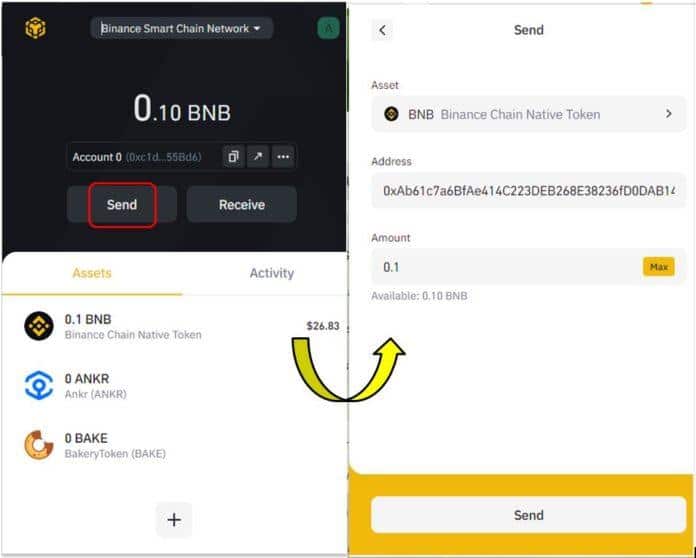
You can send coins to an external party by selecting the Send option on the interface. You will take three steps to do this transaction.
- First, choose the token you would like to send.
- Second, supply the crypto address of the recipient.
- Third, specify the crypto amount to send.
- Once you have confirmed that the provided information is correct, click the Send button to complete the transaction.
Add tokens
By default, you will see only the BNB balance in your wallet. To add another token, click Assets and scroll down to find the plus sign (see image below). Click this button and follow the instructions.
Staking coins
You can stake any coin in your wallet as long as the option is available for it. To initiate the process, find the Staking button and click on it. When you do so, you will see the page below.
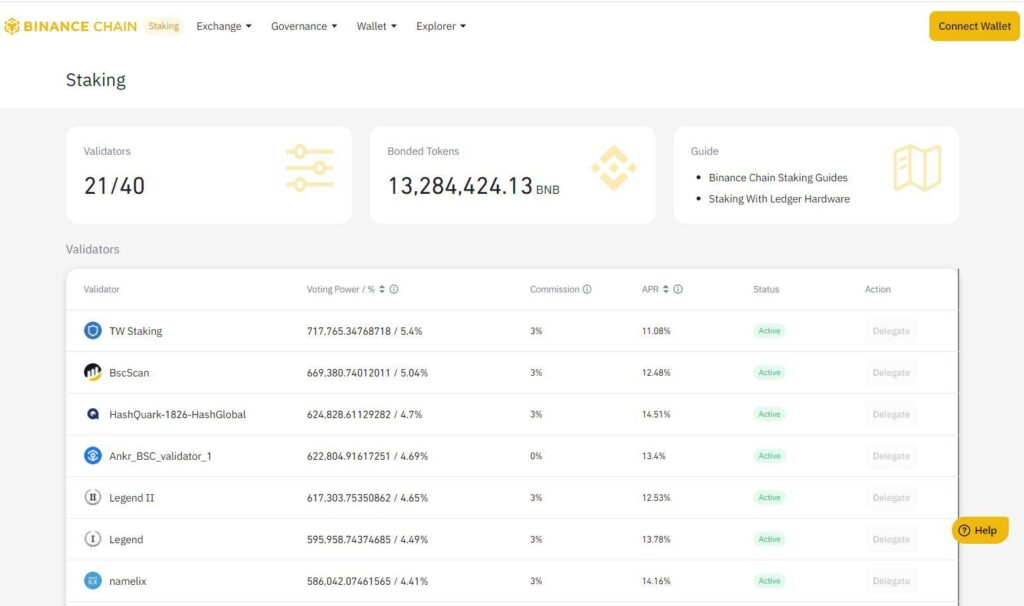
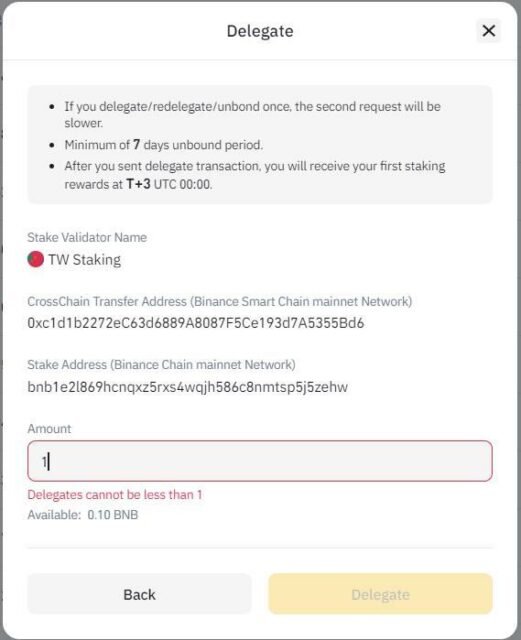
The image above shows a listing of available validators with the delegation details. Select a validator and then hit the corresponding Delegation button on the far-right portion. After this, you will see a pop-up window to specify the number of coins to delegate. Once the details are okay, hit the Delegation button.
How to start?
To start using the wallet, install the plugin to your desired browser. Then follow the setup process below.
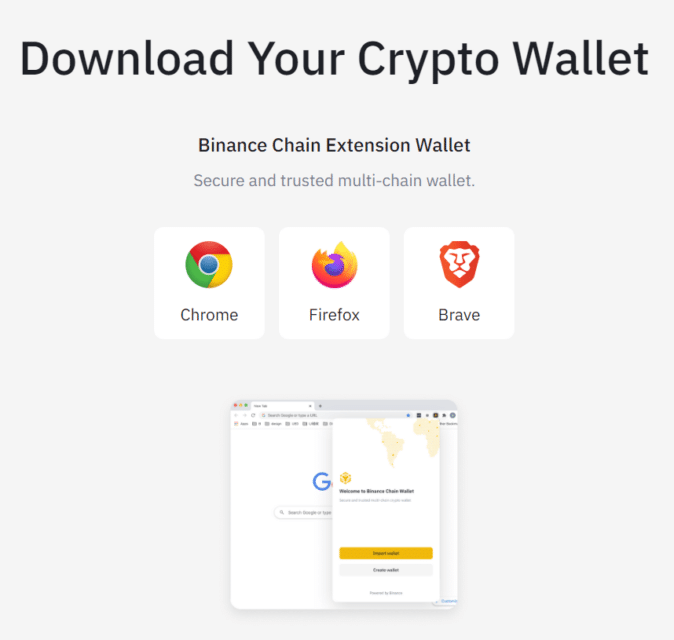
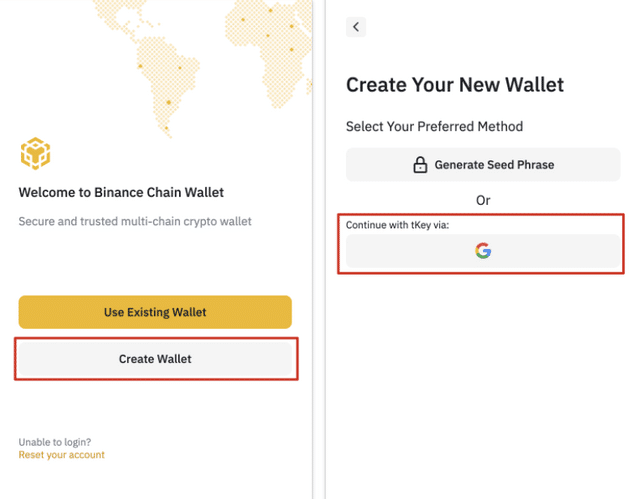
- Visit the website and find the section that contains a message to download your wallet. Once found, click on the browser you wish to install the plugin.
- Install the plugin and enroll in a Binance wallet account. We will use Gmail in this example. Click on the button containing the message “Continue with tKey via Google.” Refer to the image below.
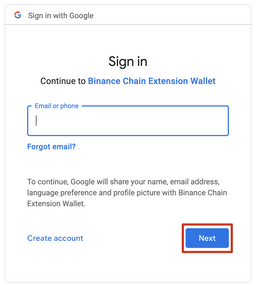
- A pop-up window will show up instructing you to provide the gmail.com email address to use for your wallet. This email address can help you retrieve your wallet in case you lose your credentials.
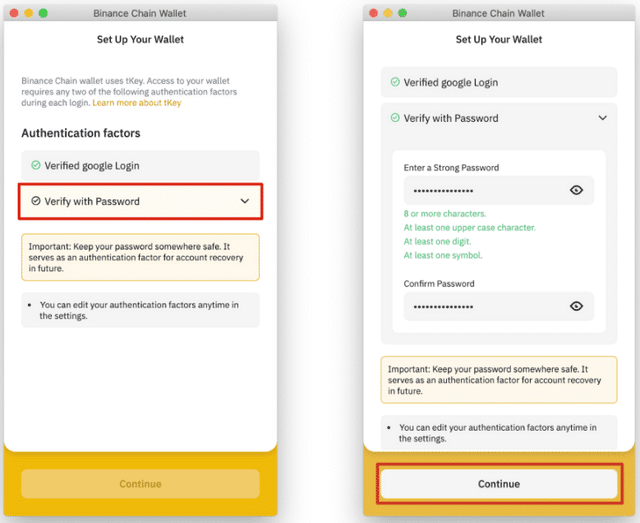
- Nominate a strong password and input it two times.
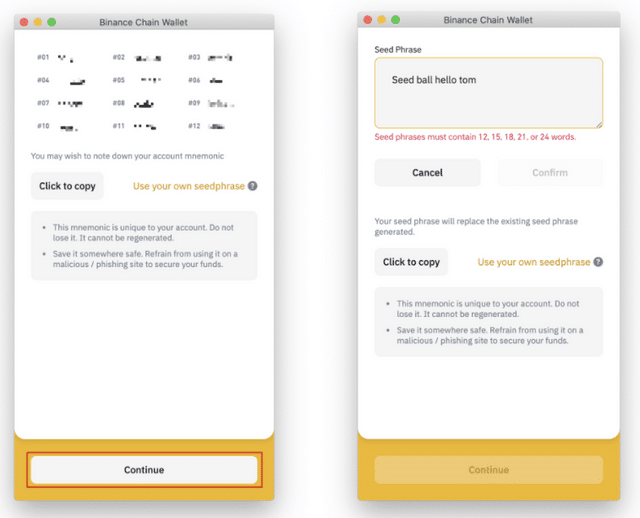
- You will receive your seed phrase or recovery phrase afterward. As an alternative, you can propose your own seed phrase. Save your recovery phrase, and hit Continue. After this, the setup is complete. Check the image below.
How to pick up alternatives?
You have plenty of choices when it comes to crypto wallets. Apart from Binance wallet, your other good options are the following:
Final thoughts
If you are a Binance user and want to transact with other networks, that is possible with this wallet. As a browser plugin, this wallet is a free solution you can tap at any time. As with the exchange, transactions in the wallet are not free.
Apart from this, security is a concern among users because the wallet runs as a browser extension. If you can live with this risk, go ahead with this crypto wallet option.
